.png)
.png)
.png)

Expert Troubleshooting in 5 Steps: Your Practical Danfoss OMS Service Manual Guide
October 24, 2025
Abstract
This article provides an exhaustive examination of the procedures and principles outlined in the Danfoss OMS service manual. It serves as an in-depth guide for technicians and engineers responsible for the maintenance, troubleshooting, and repair of Danfoss OMS series orbit hydraulic motors. The exploration begins with a foundational understanding of the motor's unique gerotor/geroler operational mechanics and its pivotal role across various industrial applications. The discourse then progresses through a systematic, five-step methodology covering manual interpretation, diagnostic protocols, meticulous disassembly, component inspection, and precise reassembly. Emphasis is placed on cultivating a deep, empathetic understanding of the hydraulic system as an integrated whole, moving beyond mere procedural execution. By contextualizing technical instructions with principles of fluid dynamics, material science, and preventive maintenance, the article aims to empower professionals to enhance motor longevity, reduce operational downtime, and ensure system reliability. The objective is to transform the service manual from a static document into a dynamic tool for problem-solving and operational excellence.
Key Takeaways
- Master the five-step process for effective troubleshooting and repair.
- Use the Danfoss OMS service manual to diagnose issues accurately.
- Properly inspect internal components like the geroler set for wear.
- Follow precise reassembly and torque specifications to prevent leaks.
- Implement a preventive maintenance schedule to extend motor life.
- Understand that hydraulic fluid health is paramount for motor performance.
- Source genuine parts to guarantee compatibility and system integrity.
Table of Contents
- Introduction to the Danfoss OMS Series: The Heart of Your Hydraulic System
- Step 1: Decoding the Danfoss OMS Service Manual – Your Foundational Knowledge
- Step 2: Systematic Diagnosis – Identifying the Root Cause of Failure
- Step 3: Precise Disassembly and Inspection – A Surgical Approach
- Step 4: Meticulous Reassembly and Seal Replacement – Ensuring Longevity
- Step 5: Post-Service Testing and System Integration – Validating Your Work
- Frequently Asked Questions (FAQ)
- Conclusion
- References
Introduction to the Danfoss OMS Series: The Heart of Your Hydraulic System
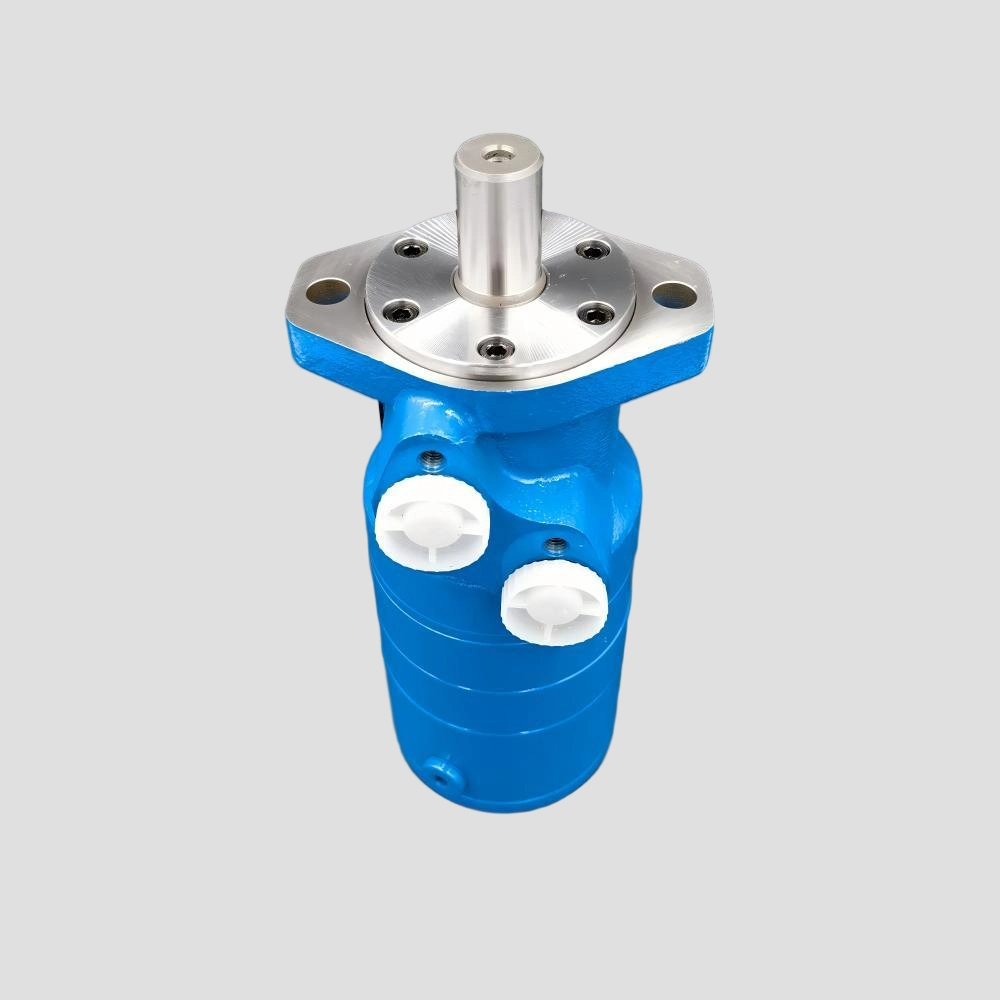
When we contemplate the immense power of modern machinery, from the agricultural harvester combing through a vast field to the construction excavator shaping a new landscape, our thoughts might not immediately turn to the components hidden deep within. Yet, at the core of these powerful applications, you will often find a marvel of engineering: the hydraulic motor. Specifically, the Danfoss OMS series of orbit hydraulic motors represents a cornerstone of fluid power technology. To truly appreciate the task of servicing these units, we must first develop an empathetic understanding of their function and design. Think of these motors not as simple mechanical parts, but as the muscular heart of a complex hydraulic circuit, tirelessly converting fluid pressure into the rotational force that brings machinery to life. Their reliability is not a given; it is a direct consequence of careful design, proper application, and, most importantly, diligent maintenance guided by documents like the Danfoss OMS service manual.
What Makes Orbit Hydraulic Motors Unique?
To grasp the essence of a Danfoss OMS motor, one must look inside to its ingenious operating principle. Unlike some other types of hydraulic motors that use pistons or vanes, the OMS series employs an orbital design, specifically a gerotor or, more commonly, a Geroler™ set. Imagine a fixed outer ring with internal teeth and a smaller, rotating inner gear (the "star") with one fewer tooth that orbits and rotates within it. As pressurized hydraulic fluid from an electric hydraulic pump is directed into the expanding chambers created between these two parts, it forces the inner gear to move. This orbital motion is the key. It is not just a simple spin; the inner gear's center traces a circular path around the center of the outer ring. This unique movement directly turns the motor's output shaft through a coupling, generating smooth, high-torque rotation even at very low speeds.
What does this mean in a practical sense? This design is exceptionally compact for the amount of power it delivers. It eliminates the need for complex gearboxes in many applications, simplifying the overall machine design. The rolling contact of the Geroler™ set, an advancement on the original gerotor design, minimizes friction and wear, contributing to a long operational life and high efficiency. Understanding this internal dance of components is the first step toward diagnosing their ailments. When a motor falters, you are not just looking at a broken part; you are investigating a disruption in this precise orbital ballet.
The Role of OMS Motors in Modern Machinery
The application of these orbit hydraulic motors is incredibly diverse, a testament to their robust and flexible design. In South America, you might find them on coffee harvesters, providing the delicate yet firm power needed to shake beans from branches without damaging the plant. Across the agricultural plains of Russia, they drive the conveyors on potato harvesters and the spinner discs on fertilizer spreaders. In the booming construction sectors of Southeast Asia and the Middle East, OMS motors are the workhorses that turn the augers on drilling equipment, rotate the sweeping brushes on street cleaners, and power the winches on compact loaders. In South Africa's mining and marine industries, their high torque capacity is put to the test, driving heavy-duty conveyors and capstans.
Each of these environments presents a unique challenge—dust, humidity, extreme temperatures, and continuous operation. The success of these machines hinges on the reliability of their hydraulic systems. A failure in an orbit hydraulic motor is not just a mechanical issue; it is lost productivity, a delayed harvest, or a stalled construction project. This is why a deep familiarity with the Danfoss OMS service manual is not merely a skill for a technician but a form of economic stewardship for the business owner.
Why a Service Manual is Your Most Valuable Tool
It is a common human tendency to turn to instructions only when something has gone wrong. We assemble furniture with a sense of intuitive confidence, only to stare at the manual in confusion with a handful of leftover screws. In the world of high-pressure hydraulics, this approach is fraught with risk. The Danfoss OMS service manual should not be viewed as a last resort but as a foundational text for the entire lifecycle of the motor. It is your map, your encyclopedia, and your trusted advisor.
Think of it this way: the manual provides the manufacturer's own accumulated wisdom. It contains the precise tolerances, the correct torque values, and the recommended procedures that were established through countless hours of research, development, and testing. To ignore it is to discard a wealth of expert knowledge. Proactive maintenance, guided by the manual's specifications for fluid types, filter changes, and inspection intervals, is the most powerful way to prevent catastrophic failures. When a problem does arise, the troubleshooting charts within the Danfoss OMS service manual offer a logical, systematic path to a diagnosis, saving hours of guesswork and preventing the costly replacement of components that were not the root cause of the problem. It helps us move from being a reactive "parts changer" to a proactive "system diagnostician."
Step 1: Decoding the Danfoss OMS Service Manual – Your Foundational Knowledge
Before a single wrench is turned, the most potent tool a technician can wield is knowledge. The Danfoss OMS service manual is a dense, information-rich document that can feel intimidating at first glance. However, by approaching it with a structured methodology, you can transform it from a confusing collection of pages into a clear and logical guide. This is the foundational step upon which all successful repairs are built. It is an exercise in translation, learning the language of the engineers who designed and built the motor. This initial investment in understanding will pay dividends in speed, accuracy, and safety throughout the service process.
Navigating the Manual's Structure: From Specifications to Schematics
Most technical manuals, including the Danfoss OMS service manual, follow a predictable and logical structure. Your first action should be to simply familiarize yourself with the table of contents. Treat it like the map of a new city you are about to explore. You will typically find sections dedicated to:
- General Information and Safety: This section is paramount. It outlines the necessary personal protective equipment (PPE), warnings about stored hydraulic energy, and general handling procedures. Reading this section is not a formality; it is a moral and professional obligation to ensure your safety and the safety of those around you.
- Technical Specifications: Here, you will find the motor's "biography." This includes data on displacement, maximum speed and torque, pressure ratings (continuous and peak), and compatible fluid types. These numbers are not abstract; they are the performance boundaries within which the motor is designed to operate safely and efficiently.
- Installation: This section details how the motor should be mounted, how hydraulic lines should be connected, and the proper procedure for the initial start-up. Even if you are only servicing the motor, reviewing this can reveal if an installation error is contributing to the problem.
- Troubleshooting: This is often presented as a chart or a series of "if-then" statements. It connects observable symptoms (e.g., "motor runs erratically") to potential causes and recommended actions. This is your primary diagnostic guide.
- Disassembly and Reassembly: These are the step-by-step procedural guides. They are written in a specific sequence for a reason—to prevent damage to components and ensure that everything fits back together correctly. They will also specify which parts are recommended for replacement during any major service, such as seals and O-rings.
- Parts List and Exploded Views: This is your visual dictionary. The exploded diagram shows how every single component fits together, and the parts list provides the official part numbers, which are indispensable for ordering correct replacements.
By spending ten minutes just understanding this layout, you will know exactly where to turn when a specific question arises during your work.
Understanding Key Terminology and Symbols
Hydraulics has its own language, a shorthand of terms and symbols that efficiently convey complex information. The Danfoss OMS service manual is written in this language. To decode it, you must become fluent. For example, understanding the difference between "pressure" (the force exerted, measured in bar or PSI) and "flow" (the volume of fluid moving over time, measured in LPM or GPM) is fundamental. Pressure creates the force (torque), while flow determines the speed (RPM). A motor running slowly might not have an internal problem; it could be "starved" of flow from the electric hydraulic pump.
Hydraulic schematics use a standardized set of symbols. A circle represents a pump or motor. A square represents a valve. Lines represent hoses or pipes. Arrows indicate the direction of flow. Learning to read these symbols allows you to understand the motor's place within the entire machine's hydraulic circuit without having to physically trace every single hose. Below is a table of common symbols you will encounter.
| Symbol | Meaning | Description and Context in a Danfoss OMS Service Manual |
|---|---|---|
| Hydraulic Motor (Fixed Displacement) | A circle with a solid black triangle pointing inward. This represents your OMS motor, indicating it converts hydraulic energy into mechanical rotation at a fixed rate per revolution. | |
| Hydraulic Pump (Fixed Displacement) | A circle with a solid black triangle pointing outward. This represents the pump (like an electric hydraulic pump) that supplies the flow to the motor. | |
| Pressure Relief Valve | A square with an arrow inside, held closed by a spring symbol. This is a safety device in the system that opens to divert flow back to the tank if pressure exceeds a set limit, protecting the OMS motor. | |
| Filter or Strainer | A diamond shape with a dashed line across the middle. The manual will stress the importance of filtration to protect the precise internal components of the orbit hydraulic motor from contamination. | |
| Tank (Reservoir) | An open-topped rectangle. This represents the hydraulic fluid reservoir, the source and destination for the fluid in the circuit. | |
| Check Valve | A ball pressed against a seat. This valve allows fluid to flow in only one direction. In an OMS motor circuit, it might be used in the drain line to prevent backpressure. |
Safety First: A Deep Dive into Pre-Service Precautions
In any interaction with a hydraulic system, complacency is the enemy of safety. The pressures involved are immense, and the potential for injury is serious. The safety section of the Danfoss OMS service manual is the most significant part of the document. Before any service begins, a rigorous safety protocol must be followed.
First, consider the concept of stored energy. Even with the machine turned off, hydraulic fluid can be held under high pressure within accumulators or by the weight of a raised implement. This pressure must be safely relieved before any fitting is loosened. The manual will provide the specific procedure for this, which often involves operating the machine's controls with the engine off to cycle the valves and release trapped pressure.
Second is the principle of Lockout/Tagout (LOTO). The machine must be fully de-energized and its power source (e.g., the key, the main battery disconnect) must be secured in the "off" position with a lock. A tag is attached that clearly states "Do Not Operate" and identifies the person performing the service. This prevents anyone from accidentally starting the machine while you are working on it. It is a simple procedure that has saved countless lives.
Third, Personal Protective Equipment (PPE) is non-negotiable. At a minimum, this includes safety glasses to protect from high-pressure fluid injection injuries and chemical-resistant gloves to protect your skin from hydraulic fluid, which can cause severe irritation or be absorbed into the body.
Finally, cleanliness is a form of safety and a prerequisite for a quality repair. Before disconnecting any lines to the orbit hydraulic motor, thoroughly clean the motor and the surrounding area. This prevents dirt and debris from entering the hydraulic system, where it can cause catastrophic damage to the sensitive internal components of the motor and other parts of the system.
Step 2: Systematic Diagnosis – Identifying the Root Cause of Failure
Once you have a firm grasp of the information within the Danfoss OMS service manual, you can transition from student to detective. The goal of diagnosis is not just to identify the failed part but to understand why it failed. A leaking shaft seal, for example, is a symptom. The root cause might be a worn shaft bearing, excessive case drain pressure, or contaminated fluid. Simply replacing the seal without addressing the underlying cause ensures the failure will soon repeat itself. A systematic approach, blending sensory observation with the logical guidance of the manual, is the key to an effective and lasting repair.
The "Listen, Look, and Feel" Approach to Initial Assessment
Long before you pick up a pressure gauge, your own senses are your most powerful diagnostic tools. This is where the art of the technician meets the science of hydraulics.
- Listen: A healthy hydraulic motor, like one from the Danfoss OMS series, typically operates with a consistent, low hum. Pay close attention to any changes in this sound. A high-pitched whine can indicate aeration (air in the fluid) or cavitation (fluid vaporizing due to low pressure at the pump inlet). A grinding or knocking sound is far more serious and often points to mechanical failure, such as a failing bearing or a broken component within the Geroler™ set. Listen to the motor under different load conditions. Does the sound change with speed or pressure?
- Look: A visual inspection can reveal a wealth of information. The most obvious sign is leakage. Where is the fluid coming from? A leak at the shaft seal is common, but leaks from the body of the motor (at the seams where sections are bolted together) or from the hose fittings can point to different problems. Look at the hydraulic fluid itself. Take a small sample. Is it clear and bright, or is it milky (indicating water contamination) or dark and sludgy (indicating thermal breakdown or severe contamination)? Look for external damage to the motor housing or hoses that could indicate an impact or other physical trauma.
- Feel: With extreme caution, you can learn a lot through touch. A motor that is excessively hot to the touch is a major red flag. Overheating can be caused by excessive internal leakage (a worn-out motor), high system pressure, or inefficient cooling. Place your hand (carefully) on the hydraulic lines leading to and from the motor. Is there a significant temperature difference? Feel for unusual vibrations. While some vibration is normal, excessive or erratic vibration can signal bearing failure, misalignment, or pump issues.
This initial sensory assessment helps you narrow down the possibilities before you even consult the troubleshooting chart. It provides context for the symptoms you are observing.
Common Failure Modes and Their Symptoms
While every failure is unique, many problems with orbit hydraulic motors fall into several common categories. Understanding these helps you to quickly connect a symptom to a likely group of causes. The Danfoss OMS service manual will detail these, but let's explore the logic behind them.
| Symptom | Potential Root Causes (Simplified) | Diagnostic Thought Process |
|---|---|---|
| Motor will not rotate | No flow/pressure; Seized Geroler set; Sheared shaft/coupling; Relief valve stuck open | Is the pump working? Check system pressure. If pressure is present but the motor is stalled, the issue is likely internal to the motor or a mechanical blockage downstream. |
| Motor runs slow or has low power | Worn Geroler set (internal leakage); Low pump flow; Relief valve set too low; Clogged filter | The motor is losing efficiency. Fluid is bypassing the working components. This could be internal wear or a system-level issue starving the motor of pressure or flow. |
| Motor runs erratically or "jerks" | Air in the system (aeration); Contaminated fluid causing valves to stick; Worn coupling splines | The power transmission is not smooth. This points to a problem with the fluid itself (air/dirt) or a loose mechanical connection between the motor and the load. |
| External fluid leakage | Failed shaft seal; Failed body O-rings; Loose fittings or damaged hoses | Identify the exact source of the leak. A shaft seal leak often points to other issues (worn bearing, high case pressure). A body leak suggests a problem with the main assembly bolts or seals. |
| Motor is excessively noisy | Cavitation/aeration; Bearing failure; Worn or damaged Geroler components | The noise is a clue to the type of failure. A high-pitched whine is a fluid problem. A low-pitched rumble or knock is a mechanical problem. |
| Motor overheats | High internal leakage (wear); System relief valve set too high; Inadequate system cooling | The motor is generating more heat than it can dissipate. This is a symptom of inefficiency, either within the motor itself or in the overall hydraulic circuit design. |
Utilizing the Troubleshooting Chart in the Manual
The troubleshooting chart in the Danfoss OMS service manual is your logical roadmap. It is designed to be followed systematically. Let's walk through a hypothetical scenario:
Symptom: The motor on a salt spreader is running slower than usual, and it stalls when spreading heavy, wet salt.
- Consult the Chart: You find the symptom "Motor has low power/torque."
- First Potential Cause: "Low hydraulic fluid in reservoir." You check the tank. It is full. You move to the next step.
- Second Potential Cause: "System relief valve set too low or stuck open." You connect a pressure gauge to the pressure line near the motor. You operate the system and deadhead the motor (briefly and carefully, as per procedure). The gauge reads a pressure significantly lower than the specification listed in the manual.
- Action: The chart recommends "Test and adjust/replace relief valve." You inspect the main system relief valve on the electric hydraulic pump unit. You find that the adjustment screw has backed out, likely due to vibration. You reset the pressure according to the machine's specifications.
- Verification: You re-test the spreader. The motor now has full power and speed.
In this case, the problem was not with the orbit hydraulic motor at all. Without the systematic approach dictated by the manual, you might have wasted hours, or even days, disassembling the motor, only to find nothing wrong. The troubleshooting chart prevents this by forcing you to rule out the simplest and most common external causes first, before assuming a complex internal failure. It embodies the principle of working from the outside in.
Step 3: Precise Disassembly and Inspection – A Surgical Approach
Once systematic diagnosis has confirmed that the fault lies within the hydraulic motor itself, the next phase begins: disassembly and inspection. This is not a demolition; it is a careful, methodical operation. The goal is to expose the internal components for examination without causing any collateral damage. Every step must be deliberate, and cleanliness is of the utmost importance. Think of yourself as a surgeon preparing for an operation. Your workspace is the operating theater, your tools are the surgical instruments, and the motor is your patient. A successful outcome depends on precision, patience, and a keen eye for detail. Consulting the Danfoss OMS service manual during this process is not a sign of weakness but of professionalism.
Preparing Your Workspace and Tools
Before the first bolt is loosened, prepare your environment. A clean, well-lit workbench is essential. Lay down a clean, lint-free cloth or a rubber mat to place parts on. You will need a drip pan to catch residual hydraulic fluid. Dirt is the mortal enemy of hydraulic components. A single grain of sand can score a finely machined surface and lead to premature failure.
Gather your tools. In addition to a standard set of high-quality wrenches and sockets, you may need some specialized equipment. A torque wrench is not optional; it is mandatory for reassembly. Snap-ring pliers will be needed for retaining rings. A soft-faced mallet (brass or plastic) is used for gently tapping components apart or together without damaging them. You will also need measuring tools like a set of feeler gauges and a micrometer or vernier caliper to check for wear against the specifications listed in the Danfoss OMS service manual. Having everything ready beforehand prevents interruptions and allows you to maintain focus on the task.
Step-by-Step Disassembly Following Manual Guidelines
The Danfoss OMS service manual provides a specific disassembly sequence. Follow it religiously. Deviating from this sequence can lead to damaging parts or making reassembly much more difficult.
- Marking for Alignment: Before separating the main body sections of the motor, use a permanent marker or a center punch to make alignment marks across the sections. This ensures you reassemble them in the exact same orientation, which is often critical for proper porting and timing.
- Removing External Components: Begin by removing any external fittings, valves (like counterbalance or check valves), and the drain line connections.
- Main Body Bolts: Loosen the main bolts that hold the motor together in a crisscross pattern, a little at a time, just like you would with a car's cylinder head. This prevents warping the end caps or housing. Once they are all loose, remove them.
- Separating the Sections: Gently separate the end cap, the housing, the Geroler™ set, and the ported valve plate. Parts may be held together by a slight vacuum or sticky O-rings. A light tap with a soft-faced mallet may be necessary. Never pry components apart with a screwdriver, as this will gouge the sealing surfaces.
- Organizing the Parts: As you remove each component, lay it out on your clean bench in the exact order and orientation it came out. This creates a visual map for reassembly. Pay close attention to the placement of seals, O-rings, and thrust washers. Taking a few digital photos with your phone at each stage is an excellent practice that can save you from a major headache later.
- Removing the Shaft and Bearings: The procedure for removing the output shaft and its bearings will vary depending on the specific OMS model. It may involve removing a large snap ring and then pressing the shaft out of the housing. The manual is your definitive guide here.
Inspecting Critical Components: Geroler Set, Shaft, Seals, and Bearings
With the motor disassembled, the inspection begins. Clean each part thoroughly with a suitable solvent and dry it with compressed air. Now, examine each piece like a forensic scientist looking for clues.
- Geroler™ Set (The Heart): This consists of the outer ring and the inner star. Inspect the contact surfaces of both parts. Look for any signs of scoring (deep scratches), pitting (small craters), or spalling (flaking of the metal surface). Run your fingernail over the surfaces; you can often feel imperfections that are difficult to see. Any significant damage here will cause internal leakage, resulting in a loss of torque and efficiency. Minor polishing might be acceptable, but any deep scoring means the set must be replaced. This is one of the most vital checks when following a Danfoss OMS service manual.
- Output Shaft: Examine the splines that engage with the Geroler™ set and the external splines or keyway that connect to the load. Look for wear, twisting, or cracking. Most importantly, inspect the area where the shaft seal rides. There should be a smooth, polished surface. If there is a groove worn into the shaft, a new seal will fail quickly. In some cases, the shaft can be repaired, but replacement is often the better long-term solution.
- Seals and O-Rings: Never reuse old seals and O-rings. During inspection, however, look at how they have failed. A shaft seal that is brittle and hard has likely failed from overheating. A seal that has been pushed out of its bore indicates excessive case drain pressure. An O-ring that is flattened or "squared off" has suffered from compression set over time. These clues help you confirm your root cause diagnosis.
- Bearings: Whether the motor uses needle bearings, roller bearings, or bushings, they must be inspected carefully. For roller bearings, rotate them by hand. They should feel perfectly smooth, with no roughness, notchiness, or excessive play. Any noise or resistance means the bearing is failing and must be replaced. A bearing failure is catastrophic, as it allows the shaft to move off-center, which will quickly destroy the Geroler™ set and seals.
Measuring Tolerances: When Wear Becomes a Problem
Visual inspection is good, but measurement provides objective data. The Danfoss OMS service manual will provide critical wear tolerances. For example, it might specify the maximum allowable clearance between the Geroler™ star and ring, or the maximum allowable end play for the shaft. Use your feeler gauges and micrometer to take these measurements. Compare your readings to the specifications in the manual. If a component is worn beyond its service limit, it must be replaced. There is no room for sentiment here. Reinstalling a part that is out of spec is a guarantee of a repeat failure and a waste of your time and the owner's money. This commitment to measurement is what separates a professional technician from an amateur.
Step 4: Meticulous Reassembly and Seal Replacement – Ensuring Longevity
The reassembly of a Danfoss OMS motor is a process of restoration. It is where your careful inspection and diagnosis culminate in a tangible result: a renewed and reliable component. This stage demands as much, if not more, precision and care than the disassembly. A single misplaced seal, a piece of dirt, or an incorrectly torqued bolt can undo all your hard work. The Danfoss OMS service manual is your script, and you must follow it without deviation. The goal is not just to put the motor back together, but to imbue it with a new lease on life, ensuring it performs as its designers intended.
The Anatomy of a Seal Kit: Understanding Each Component's Function
When you service one of these orbit hydraulic motors, you should always use a complete, genuine seal kit. These kits are inexpensive compared to the cost of a second teardown. Opening the kit, you will find an assortment of O-rings, backup rings, and a main shaft seal. Do not be tempted to just match them by size. Each seal has a specific location and, often, a specific material composition designed for its unique role.
- The Shaft Seal: This is the most critical seal. It prevents the low-pressure case drain fluid inside the motor from leaking out along the output shaft and prevents external contaminants from getting in. It is often a "lipped" seal, sometimes with a dust excluder lip as well. Its orientation is paramount; installing it backwards will cause it to fail immediately.
- Body O-Rings: These are static seals that sit in grooves between the main sections of the motor (end caps, housing, etc.). They prevent the high-pressure hydraulic fluid from leaking externally.
- Backup Rings: You will often find thin, hard plastic rings alongside the O-rings, especially in high-pressure areas. These are backup rings. Their job is not to seal but to support the O-ring and prevent it from being extruded into the clearance gap between metal parts under high pressure. They are always installed on the low-pressure side of the O-ring.
- Commutator and Valve Plate Seals: These are specialized seals that ensure the correct distribution of fluid from the valve plate to the Geroler™ set. Their integrity is essential for the motor's proper timing and efficiency.
Before you begin, lay out the new seals next to the old ones you removed, confirming you have the correct replacement for each location. This simple check can prevent major errors.
Best Practices for Installing Shaft Seals and O-Rings
Seals are delicate. A tiny nick or tear during installation can create a leak path.
- Lubrication is Key: Never install a seal dry. Liberally lubricate all seals and O-rings with clean hydraulic fluid or a specialized seal lubricant. This helps them slide into place without damage and ensures a good initial seal.
- Protect the Seal: The sharp edges of splines or keyways on the output shaft can easily cut the lip of the new shaft seal during installation. The best practice is to cover these sharp edges with a thin plastic sleeve or even tightly wrapped electrical tape. Slide the seal over the protected area, then remove the covering.
- Proper Tools: Use a proper seal driver or a socket with a diameter that matches the outer metal case of the shaft seal to gently and evenly tap it into its bore. Make sure it goes in straight and seats fully at the bottom of the bore. Never press on the flexible rubber lip of the seal. For O-rings, use your fingers or a blunt, non-metallic tool to gently guide them into their grooves. Avoid using sharp screwdrivers or picks.
Reassembly Sequence and Correct Torquing Procedures
Reassemble the motor in the exact reverse order of disassembly. Your organized layout of parts and the photos you took will be invaluable here. Pay attention to your alignment marks to ensure the sections go together in the correct orientation.
The final and most critical step of the assembly is tightening the main body bolts. The Danfoss OMS service manual will specify a precise torque value and a tightening sequence. This is not a recommendation; it is a strict requirement.
- The "Why" of Torque: The torque specification ensures that the bolts provide the correct clamping force. Too little torque, and the body sections will leak under pressure. Too much torque, and you can warp the housing, causing internal components to bind, or even stretch and weaken the bolts themselves.
- The Sequence: The bolts must be tightened in a star or crisscross pattern. This ensures the clamping force is applied evenly across the entire motor body, preventing distortion. The procedure is usually multi-stage: first, tighten all bolts to a low "snug" torque, then repeat the pattern, bringing them to the final specified torque.
Using a calibrated torque wrench is the only way to ensure this is done correctly. Guessing is not an option. This final act of precision is what locks in the quality of your entire repair.
Integrating with an Electric Hydraulic Pump: System Considerations
After reassembling the motor, your thoughts should turn to its place in the larger system. The motor does not work in isolation; it is part of a circuit powered by an electric hydraulic pump. If the fluid in that system is contaminated, it will destroy your freshly rebuilt motor in short order. It is therefore wise, and often necessary, to perform some system-level maintenance. At a minimum, replace the system's hydraulic filters. If the old motor suffered a catastrophic failure (e.g., shattered Geroler™ set), the entire system, including the tank, hoses, and valves, must be flushed to remove all metal debris. Re-introducing a rebuilt motor into a contaminated system is a recipe for immediate failure.
Step 5: Post-Service Testing and System Integration – Validating Your Work
The repair process does not conclude when the last bolt is torqued. The final phase—testing and integration—is the validation of your craftsmanship. This is where you prove that the diagnosis was correct and the repair was executed with precision. It is a methodical process of reintroducing the motor to the hydraulic system, carefully checking its vital signs, and ensuring it performs to specification under real-world conditions. Rushing this final step can lead to immediate failure or mask underlying problems that will surface later. A patient and observant approach during start-up is the hallmark of a true professional who stands behind their work.
Initial Start-Up Procedures: Bleeding Air and Checking for Leaks
Before starting the machine's prime mover (the engine or electric motor), you must prepare the hydraulic motor for its first taste of fluid.
- Filling the Case: Most orbit hydraulic motors have a dedicated case drain line. This line's purpose is to carry away any fluid that internally bypasses the Geroler set and to lubricate the bearings and shaft seal. Before start-up, it is best practice to fill the motor housing with clean hydraulic fluid through the highest drain port. This ensures the bearings are not "dry" on initial rotation, which could cause immediate damage. The Danfoss OMS service manual will specify this procedure.
- Bleeding Air: Air is compressible, while oil is not. Air trapped in a hydraulic system can cause spongy, erratic operation and loud noises (aeration). It can also lead to an explosive expansion of hot fluid when a system is opened. Therefore, you must bleed the air out. With the motor case filled, ensure all fittings are tight except for one of the main work ports. Loosen it just slightly. Have a colleague slowly "jog" the prime mover in short bursts until a clear, air-free stream of oil weeps from the loose fitting. Tighten the fitting to its proper torque.
- The First Rotation: Start the machine at the lowest possible idle speed. Operate the control valve to slowly rotate the motor in both directions for a few minutes with no load applied. During this time, your full attention should be on looking and listening. Look for any leaks, especially around the shaft seal and the body seams you re-sealed. Listen for any of the abnormal noises we discussed earlier—whining, grinding, or knocking. If you see or hear anything amiss, shut down the system immediately and investigate.
Performance Testing: Verifying Speed, Torque, and Pressure
Once the initial no-load run is successful, it is time to test the motor's performance. This confirms that its efficiency and power have been restored.
- Speed Check: With the system running at its normal operating RPM, use a non-contact photo tachometer to measure the rotational speed of the motor's output shaft. Compare this reading to the machine's specifications. A slow speed could still indicate a flow problem from the pump or a restriction elsewhere in the system.
- Pressure and Load Test: Safely introduce a load to the motor. This could mean operating the conveyor, winch, or auger it is designed to drive. Monitor the system pressure gauge as the load is applied. The pressure should rise smoothly, and the motor should handle the load without stalling or slowing excessively. The pressure should remain at or below the maximum continuous rating specified in the Danfoss OMS service manual.
- Temperature Check: After running the system under load for 15-20 minutes, carefully check the temperature of the motor housing. It will be warm, but it should not be painfully hot to the touch. An excessively hot motor indicates high internal leakage (meaning the repair was not successful) or a problem with the overall system's cooling capacity.
Long-Term Preventive Maintenance Strategies
A successful repair is an opportunity to educate the machine's owner or operator on how to prevent future failures. The longevity of your repair depends heavily on how the machine is maintained going forward.
- Fluid is Everything: Emphasize that hydraulic fluid is not just a power transmission medium; it is also a lubricant and a coolant. It must be kept clean and cool. Recommend a strict schedule for changing the hydraulic fluid and filters, based on the manufacturer's recommendations or the severity of the operating environment.
- The Power of Observation: Encourage operators to perform a brief walk-around inspection before each day's work. They should look for leaks, check the fluid level in the reservoir, and listen for any changes in the sound of the hydraulic system. Catching a small leak or a new noise early can prevent a catastrophic failure.
- Fluid Analysis: For high-value machinery, recommend a program of regular hydraulic fluid analysis. A lab can test a sample of the fluid and provide a detailed report on its condition, the level of contamination, and even the types of metals present (which can indicate which components are wearing). This is like a blood test for the machine, providing an unparalleled view into its internal health.
Sourcing Reliable Hydraulic Motors and Parts for Future Needs
Part of a comprehensive service strategy involves knowing where to source high-quality components for future repairs or replacements. When a motor is truly beyond repair, or when you need a new seal kit, using reliable parts is paramount. Opting for cheap, non-genuine parts is a false economy. They may not meet the same material specifications or manufacturing tolerances, leading to poor performance and premature failure. Establishing a relationship with a reputable supplier who can provide genuine or high-quality aftermarket hydraulic motors and parts ensures that you are always installing components you can trust. This protects your reputation as a technician and provides the best value for the machine owner in the long run.
Frequently Asked Questions (FAQ)
What are the most common reasons a Danfoss OMS motor fails? The most frequent failures stem from contaminated hydraulic fluid, which causes abrasive wear on the internal Geroler set. Another common cause is shaft seal failure, often secondary to a worn output shaft bearing or excessive case drain pressure in the system. Operating the motor beyond its specified pressure or temperature ratings also leads to premature wear and failure.
How often should I service my orbit hydraulic motor? Preventive service intervals depend heavily on the application and operating environment. As a general rule, visual inspections for leaks and abnormal noise should be daily. Hydraulic fluid and filter changes should follow the machine manufacturer's recommendations, typically every 500 to 1000 operating hours. A complete reseal and internal inspection is not usually a scheduled task but is performed when symptoms like reduced performance or leaks appear.
Can I use a non-Danfoss seal kit for my repair? While some high-quality aftermarket seal kits exist, it is generally recommended to use a genuine seal kit specified in the Danfoss OMS service manual. This ensures that the seal materials and dimensions are perfectly matched to the motor's design and operating parameters, particularly concerning temperature and fluid compatibility. Using an incorrect seal can lead to rapid failure.
What type of hydraulic fluid is best for an OMS motor? Always refer to the Danfoss OMS service manual or the machine's operating manual for the specific fluid recommendation. Most OMS motors are designed to work with high-quality, mineral-based hydraulic fluids (like ISO VG 32, 46, or 68) containing anti-wear (AW) additives. The correct viscosity grade is crucial and depends on the ambient and operating temperatures.
Is a drop in motor speed always a sign of motor failure? No, not necessarily. A drop in speed directly corresponds to a reduction in hydraulic flow. Before disassembling the motor, you should first verify that the electric hydraulic pump is producing the correct flow rate and that there are no clogs in filters or restrictions in the hydraulic lines. A worn pump or a relief valve stuck partially open are common system-level causes of slow motor speed.
What does the displacement number on my OMS motor mean? Displacement, typically given in cubic centimeters per revolution (cc/rev) or cubic inches per revolution (in³/rev), indicates how much hydraulic fluid the motor will consume to turn one complete revolution. It is the primary indicator of the motor's size. A larger displacement motor will have higher torque but a lower maximum speed for a given hydraulic flow and pressure, compared to a smaller displacement motor.
Conclusion
To master the maintenance of a Danfoss OMS motor is to engage in a dialogue with the machine. It requires more than the ability to turn a wrench; it demands a patient and inquisitive mind. The Danfoss OMS service manual is the dictionary and grammar book for this dialogue. By internalizing its logic—from the systematic troubleshooting charts to the precise torque specifications—a technician transcends the role of a simple mechanic and becomes a true diagnostician. The five steps of decoding, diagnosing, disassembling, reassembling, and testing are not merely a procedure but a philosophy of practice. This approach fosters a deep respect for the intricate dance of pressure and flow within these powerful orbit hydraulic motors. Ultimately, a well-executed repair, guided by the wisdom contained within the service manual, does more than fix a machine. It restores productivity, ensures safety, and reinforces the value of skilled, thoughtful craftsmanship in an increasingly complex technological world.
References
American Psychological Association. (2020). Publication manual of the American Psychological Association (7th ed.).
Esposito, A. (2017). Fluid power with applications (7th ed.). Pearson.
Fitch, E. C. (2008). Fluid power engineering. CRC Press. https://doi.org/10.1201/9781420005230
G., M. J., & K., S. K. (2020). A review on failure analysis of hydraulic systems. Materials Today: Proceedings, 22, 1373-1378.
Hydraulics & Pneumatics. (2023). Contamination control for hydraulic systems. Endeavor Business Media. Retrieved from
Majumdar, S. R. (2011). Oil hydraulic systems: Principles and maintenance. Tata McGraw-Hill Education.
Purdue University. (n.d.). In-text citations: The basics. Purdue Online Writing Lab. Retrieved from https://owl.purdue.edu/owl/research_and_citation/apa_style/apa_formatting_and_style_guide/in_text_citations_the_basics.html
Stachowiak, G. W., & Batchelor, A. W. (2013). Engineering tribology (4th ed.). Butterworth-Heinemann. https://doi.org/10.1016/C2011-0-05298-9
Totten, G. E., & De-Xing, F. (Eds.). (2004). Hydraulic failure analysis: Fluids, components, and system effects. ASTM International.
Watton, J. (2007). Modelling, monitoring and diagnostic techniques for fluid power systems. Springer. https://doi.org/10.1007/978-1-84628-376-8


